Using Swagger UI to explore REST API requests
This article explains how to use Swagger UI to explore the Autotask REST API.
Overview
Swagger UI (external link) is a web-based application that empowers you to inspect the Autotask REST API visually. With Swagger, you can view all of the available REST entities and their functions, construct test requests, and view query results.
Use Swagger if:
- You'd like to browse the structure of the API from an all-in-one view.
- You'd like a comprehensive index of call examples for all API entities.
- You'd like to be able to generate sample API output from a point-and-click interface.
Proceed to the next section of this article to learn how to get started with the application. For Swagger application support, visit the SwaggerHub Support page external link).
Connecting to your Swagger UI instance
To connect to Swagger UI, in a web browser, navigate to [your platform here]/swagger/ui/index.
Replace [your platform here] with the platform-specific URL for your region from the list below.
IMPORTANT You must use the platform-specific URL associated with your user account. Swagger is unable to authenticate user sessions originating from non-native zones.
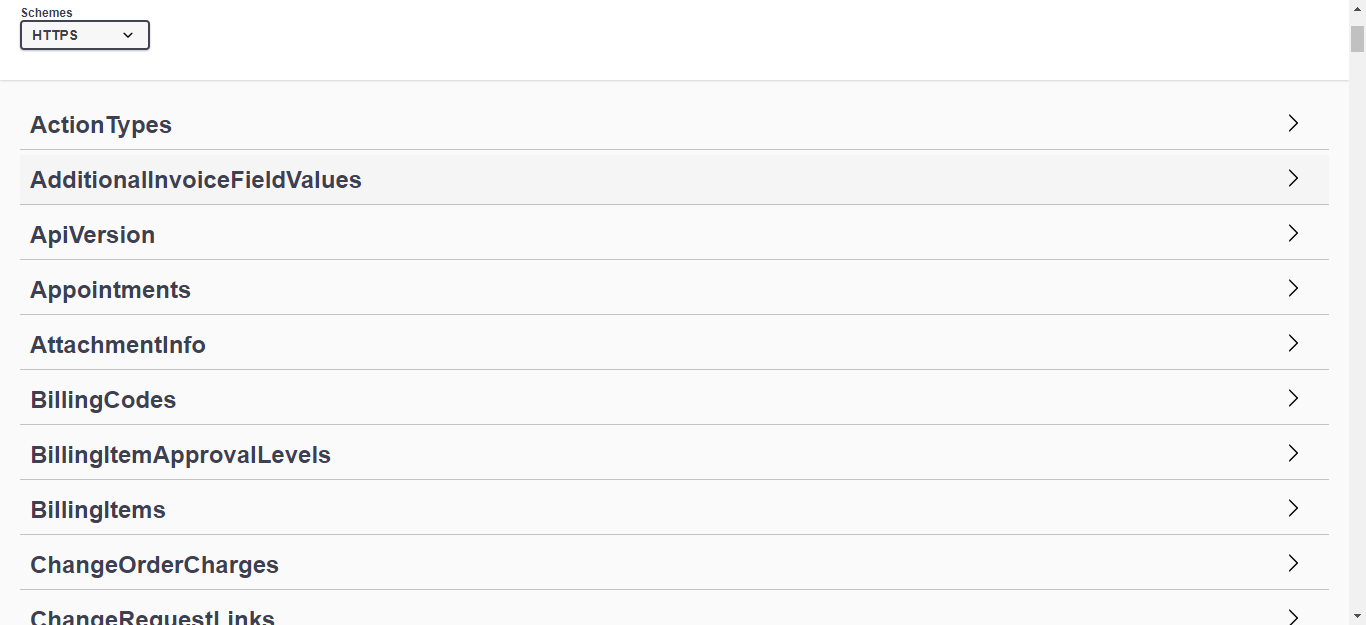
Navigating the interface
Swagger UI lists all available API entities that relate to different areas of the product. You can expand or collapse the entity list to expose varying levels of detail. When expanded, each entity shows the syntax of its available operations, along with the request method (e.g., GET, POST, PUT PATCH, or DELETE) and sample values.
When collapsed, the list shows entity names only. You can click each entity's name to expand it and view a higher level of detail.
")
To view granular information about a specific request, click its name in the expanded entity view.
The expanded request detail may include the following sections:
| Section | Description |
|---|---|
| queryModel | The Model option displays the syntax structure that requests of this type to the API should follow. The Edit Value option enables you to enter an XML-formatted query that follows the designated format. |
| ApiIntegrationCode | When making requests to the API, enter your integration code in this field. |
| UserName | To authenticate to the API for your instance, enter the name of an API user account here. |
| Secret | Enter the password for your API user in this field. |
|
ImpersonationResourceId |
Supply a value for this header when you use the REST API to impersonate another resource. If the entity supports impersonation (for example, TicketNote), then any action calls made with a valid ImpersonationResourceId will appear as if they were created by the resource associated with that ID instead of the resource associated with the UserName header. Both the entity and action must be supported; otherwise, the API will ignore the ImpersonationResourceId. |
|
Responses |
This field contains sample and actual responses that you may receive when calling the entity with the selected query. |
Making a test request
To make a test request to the API via Swagger, perform the following steps.
1. Select an entity and a query type.
2. In the expanded request detail window, click Try it out.

3. Fill out any required fields that populate and provide a query in the queryModel box.

4. When you're ready to run the query, click Execute.

5. Responses to your query will appear in the Responses section of the page for the selected entity.

6. Fields with a Download button next to them indicate that a JSON file containing the response output is available for you to save to your local device.
IMPORTANT When making requests, it is important to use the following base URL before appending the request: [API URL]/atservicesrest/v1.0/
EXAMPLE For example, if the required request was /v1.0/ActionTypes, the correct format would be [API URL]/atservicesrest/v1.0/ActionTypes.


