Adding a User-Defined Field
PERMISSIONS Configuring UDFs requires Admin permissions to both Application-wide (Shared) Features, and Admin permissions to Service Desk (Tickets), Devices, Organizations & Contacts, Contracts & Unposting or Projects & Tasks, depending on the entity. Viewing the list of UDFs only requires one or the other. Refer to Admin security settings.
NAVIGATION Left Navigation Menu > Admin > Admin Categories > Features & Settings > Application-Wide (Shared) Features> User-Defined Fields
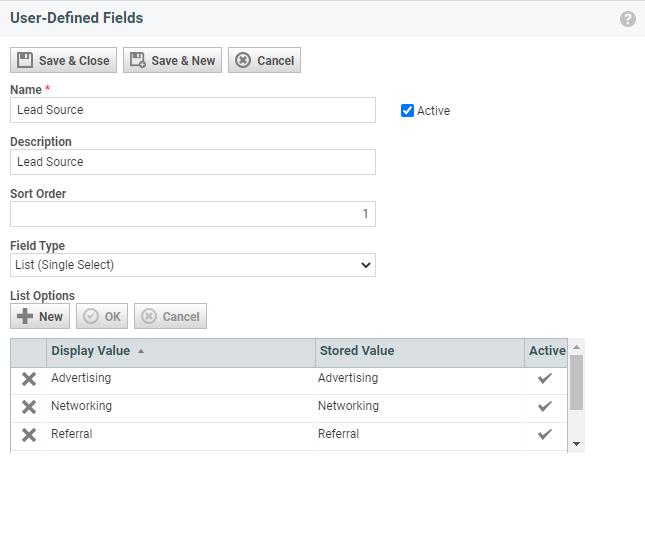
To create a user-defined field in your Autotask instance, do the following:
- To open the page, use the path(s) in the Security and navigation section above.
- Click a tab to select the entity with which the UDF will be associated.
NOTE The Organizations tab is selected by default. If you do not select a different tab, the UDF will be created for the Organization entity.
- Click New to open the User-Defined Fields page, or right-click and select Edit to edit an existing UDF.
- Populate or update the following fields:
| Field | Description | |||||||||||||||||||||
|---|---|---|---|---|---|---|---|---|---|---|---|---|---|---|---|---|---|---|---|---|---|---|
| Name | The Name will become the label for this UDF. Within the same entity, the Name must be unique, and, additionally, tasks and tickets cannot have UDFs that share the same name. NOTE A curly bracket in a UDF name causes an error when the UDF is included in a LiveReport. |
|||||||||||||||||||||
| Active | Selected by default. Clear the check box to inactivate the UDF. For details on inactive UDFs, refer to Inactivate. | |||||||||||||||||||||
| Description | Enter an optional description. | |||||||||||||||||||||
|
Required |
UDFs associated with the following entities can be set to Required: Organization, Contact, Sales Order, Subscription, Contract, Product. Site Configuration UDFs for organization type Customer can also be set as required, but we will validate this only for organizations of type Customer. This check box is cleared by default. NOTE Multi Select List user-defined fields cannot be made required. |
|||||||||||||||||||||
| Protected (check box) (Device and Site Configuration UDFs only) |
If selected, the contents of the UDF will be masked (on lists) or hidden (on Details pages) for all users except resources with permission to view protected data. Refer to Viewing protected data. If Protected is selected, but Encrypted is not, the field can be queried and updated from the API if the user account used to query has the appropriate permissions. IMPORTANT Protected UDFs that are set to Appears in Client Portal will appear just like non-protected UDFs to Taskfire users. However, if you preview Client Portal (via the Contact page or inLeft Navigation Menu > Admin > Admin Categories > Extensions & Integrations > Client Portal & Taskfire > Manage Organizations) as a contact who has Taskfire access, the UDF will not appear for you in preview mode! |
|||||||||||||||||||||
| Encrypted (check box) (Device and Site Configuration UDFs only) | This box is inactive unless the Protected box is selected first. It controls access to the UDF from the API. If you select Encrypted, the field can never be queried from the API. IMPORTANT If you clear Protected, Encrypted is automatically cleared as well. |
|||||||||||||||||||||
|
Private UDFs only appear on the Device, New Device, and Edit Device pages.
IMPORTANT It is not possible to use the Private setting with Text (URL), Date, List (single-select), List (multiselect), List (reference - single-select), and List (reference - multiselect) UDFs. UDFs with the Private setting will not appear anywhere in the UI outside of the Device pages. This means that they will not appear for selection in any column choosers, filter choosers, widget settings, LiveReports, or system reports. They will also not appear for selection in variable lists on notification templates or invoice templates. However, private UDFs are available in the API.
|
||||||||||||||||||||||
| Sort Order | This value controls the order in which the UDF itself will appear in the interface. Enter a number to control the order. If no sort order value is provided, the value will be 1, and the UDFs will appear in alphabetical order. NOTE If the UDF is associated with an entity that is managed by categories (devices, organizations, opportunities, tasks, and tickets), the category will determine where it appears and in what order. |
|||||||||||||||||||||
|
Field Type |
Select a Field Type for the UDF. For an overview of available field types per entity, refer to Field Types and Entities.
|
|||||||||||||||||||||
| Default Value | The Default Value field will appear for all UDFs except those associated with devices, organizations, opportunities, tasks, and tickets. For those UDFs, the default value is managed on the entity category. Refer to Default Value/Selection column. All field types except for Text (URL) allow you to set a default value. |
|||||||||||||||||||||
| Map from CRM Opportunity (Project UDFs only) | For Project UDFs, to populate this UDF with data stored in a CRM Opportunity UDF, select the Opportunity UDF from the drop-down menu in the Map to CRM Opportunity field. This option establishes a link to the selected Opportunity UDF, allowing you to copy information collected during the sales process to a project that results from the opportunity. Refer to Copy opportunity UDFs to project UDFs. NOTE To map the CRM Opportunity UDF to the Project UDF, the Field Type must be the same in both places. If you map a UDF of Field Type List to a Project UDF, any missing list values will be copied into the Project UDF drop-down list. 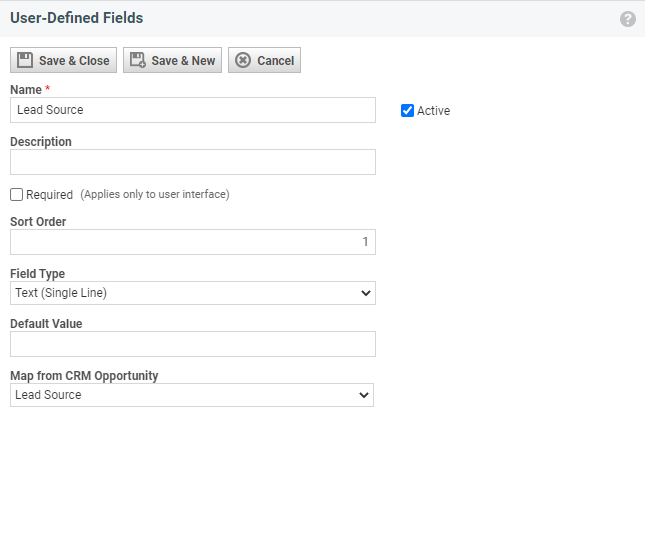 |
|||||||||||||||||||||
| Appears in Client Portal (Ticket UDFs and Device UDFs only) |
If selected, this UDF will be visible to customers in Client Portal. All UDFs except UDFs with the field type of List (Multi Select) can appear in Client Portal. IMPORTANT If this is a protected UDF, consider that only internal resources with special permissions will be able to view data in protected UDFs. Client Portal users will not be able to view the data. IMPORTANT If you are editing a ticket UDF or device UDF and clear the Appears in Client Portal check box, be aware that the UDF will be removed from the layout of all request types it was previously displayed on and any configured default values or available list values will be lost. Moreover, these values will not be restored if you check this field again later. IMPORTANT Client Portal dashboards are not managed by this setting. Depending on how the dashboard widgets are set up, UDFs with this check box cleared may appear. For more information, refer to Client Portal dashboards. |
|||||||||||||||||||||
|
Reference Entity (Device UDFs only) |
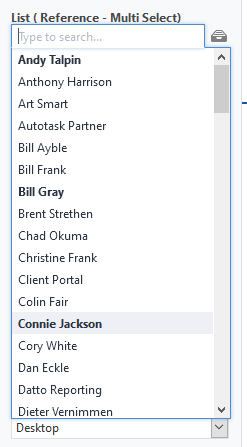
If you are adding a List (Reference - Single Select) or List (Reference - Multiselect) UDF, a Reference Entity field appears. Select the entity this field will reference. Options are:
Refer to List (Reference - Single Select) (Device UDFs only). |


- When all information for the new user-defined field is complete, click Save & Close to add the new UDF to the form of the associated entity.
NOTE If the UDF was added to an entity for which categories are available (Device, Organization, Opportunity, Task, and Ticket), the new field is initially hidden. You must add it to a section and optionally configure default values and available list values for the category. Refer to Adding and editing categories.
Not all UDF field types are available for all entities. The following table provides an overview:
| Field Type | Organization | Device | Ticket | All others |
|---|---|---|---|---|
|
Text (Single Line) |
||||
|
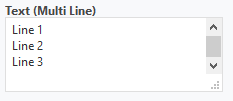
Text (Multiline) |
||||
|
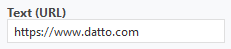
Text (URL) |
||||
|
Text (Email) |
||||
|
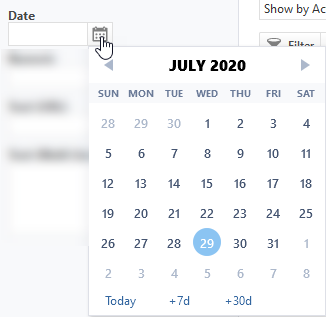
Date |
||||
|
Numeric |
||||
|
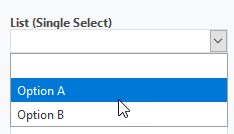
List (Single Select) |
||||
|
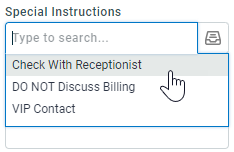
List (Multiselect) |
Tasks, Contacts, Opportunities | |||
|
List (Reference - Single Select) |
||||
|
List (Reference - Multiselect) |
Multiselect UDFs differ from other UDFs in the following ways:
Field Type conversion:
- Other types of UDFs cannot be converted to List (Multiselect) UDFs, and vice versa.
Recurring Ticket Template:
- Multiselect UDFs are not available on the Recurring Ticket Template.
APIs:
- API calls to multiselect and reference UDFs are not supported.
- They will also not be available in WebHooks or Ticket Extension Callouts.
LiveReports
- Multiselect UDFs cannot be reported on or used as a LiveReports filter.
Ticket Category:
- Multiselect UDFs cannot be set to Required for a ticket category.
Contacts:
- Default values cannot be set for contact multiselect UDFs.
Client Portal:
- Multiselect UDFs cannot be displayed on Client Portal request types.
Exporting and importing data:
- Ticket tables do not support exporting Multiselect UDFs in Import format.
- When a ticket is created and the Multiselect UDF has a default value, it will be used; otherwise, we will not set any value. When a ticket is updated by an import, we will not update the value of any Multiselect UDFs.
LiveMobile:
- Multiselect UDFs can appear in the iOS or Android versions of LiveMobile.
Column Chooser:
- Reference user-defined fields are not available on certain column choosers if the table does not support them.
Workflow Rules:
- Workflow rule updates add the newly selected value to the Multiselect UDF. Any existing values remain selected as well.
List options for single-select and multi-select list UDFs can be inactivated. The following rules will apply:
-
Inactive options can no longer be selected. However, if the now inactive list option was selected on an entity, dashboard field, etc., it will remain selected until you change the value and save the changes.
-
Inactive list values have (inactive) appended to the end of their name.
-
If a list option that is the default option for a UDF is inactivated, it will remain as the default on the category and the form template and will have (inactive) appended to it, but that inactive list option will not be available/populated on the New/Edit [Entity] page.
-
If a list value that is the global default selection for a field is inactivated, that field will no longer have a default selection.
-
The last remaining active list value for a field cannot be inactivated.
-
Data importers will still able to import, and update a UDF to, an inactive list option.
-
In the API, users will not be able to select inactive list options.


