Exporting payroll and marking timesheets as paid
PERMISSIONS Timesheet approver
NAVIGATION Left Navigation Menu > Timesheets > Pay/Export
If your local organization has enabled the Payroll Export Extension and you are a timesheet approver, you can view timesheets at three different stages: waiting approval, waiting payment, and paid and/or exported. From each stage you can view individual timesheets and, depending on which stage you are viewing, you can reject or pay timesheets and export timesheets to an external payroll application.
When the Payroll Export Extension is activated, an Administrator with access to Finance, Accounting & Invoices must access the Payroll Extension Setup page and select a Payroll Export vendor. Refer to Setting up the Payroll Export Extension.
When the extension has been set up, the logged in user must be a timesheet approver for at least one resource in order to view the Pay/Export feature.
- The user's security level has the Timesheets > Can access Paid/Exported Timesheets setting enabled
- User must be a timesheet approver for at least one resource
- User's default department must be Administration, or the Human Resources department for organizations that use that department
An Administrator must set department associations and assign timesheet approvers from the Resource Setup page, Associations tab and Approvers tab. For details, refer to Adding, editing, or copying a resource.
To view timesheets, select the list you want to view from Left Navigation Menu > Timesheets > Pay/Export. You can filter and sort the lists as described under Filtering and sorting the pay/export tables, below.
Each list, Waiting Approval, Waiting Payment, or Paid / Exported, displays the following information about each timesheet.
| Heading | Description |
|---|---|
| Department | The Resource's default department. |
| Resource | The resource submitting the timesheet. |
| Payroll Type | The type of payroll that the timesheet falls under, for example, Salary or Hourly. |
| Payroll Identifier | Number assigned on the HR tab of the Resource Management page (New/Edit Resource): Admin module Shortcut menu > Resources (Users) > select New or right-click resource and select Edit |
| Start Date | Date of the first day included on the timesheet. |
| End Date | Date of the last day included on the timesheet. |
| Total Timesheet Hours | Previously labeled Worked Hours. The total number of hours submitted on the timesheet. |
NOTE When a resource didn't meet the Weekly Billable Hours Goal, the timesheet is listed in red.
The ADP Payroll Export displays the following additional columns. These columns appear only when ADP is your selected payroll vendor.
| Heading | Description |
|---|---|
| Regular Hours | Regular Hours = min(total timesheet hours - excluded hours - unpaid hours - other hours, available hours). Available hours are set in the ADP Payroll Extension setup as either the resource's available hours (specified in Resource Management) or a set number of hours specified in the ADP Payroll Export set up. Refer to additional information under Overtime Hours, below. Other Hours and Excluded Hours are specified by Internal Time Code type in the ADP Payroll/Export setup. |
| Overtime Hours | Overtime Hours = max(timesheet hours - excluded hours - unpaid hours - other hours - available hours, 0) Available hours are determined by the setting "Calculate Overtime based on", located on the Payroll Export setup page: Left Navigation Menu > Admin > Admin Categories > Features & Settings > Finance, Accounting & Invoicing > Payroll Export. This setting determines whether Overtime is based on the resource availability set for each resource on the HR tab of the Resource Management page, or based on a default number of hours per week. For additional information, refer to Setting up the Payroll Export Extension. Other Hours and Excluded Hours are specified by Internal Time Code type in the ADP Payroll/Export setup. |
| Unpaid Hours | Total number of timesheet hours that are associated with internal time codes that are marked as Unpaid for payroll export. |
You can use the following features to filter the three Pay/Export tables: Timesheets Waiting Approval, Timesheets Waiting Payment, and Paid / Exported Timesheets.
- Filter by Date: Use the From and To fields at the top right of the list to limit the results to a specific date rang. The default To: date is the current date. The default From: date is one month previous to the current date.
- Filter by Payroll Type: Select a Payroll Type, or select All to display all payroll types.
- Sort by Selected Columns: By default, results are sorted by Department Name. To sort by Resource Name, Payroll Type, Start Date, or End Date, select the desired option from the Sort By menu.
This page displays a list of all timesheets that were submitted, but have not been approved by the resource's timesheet approver. You can reject, pay, export and view a timesheet from this option even if you are not the timesheet approver for the resource submitting the timesheet. To approve a timesheet, you must be a designated timesheet approver for the resource.
From this list you can view a timesheet and pay and export one or more timesheets.
View Timesheet
To view a timesheet, click the edit icon or right-click and select Review.
Reject, Pay, and Export
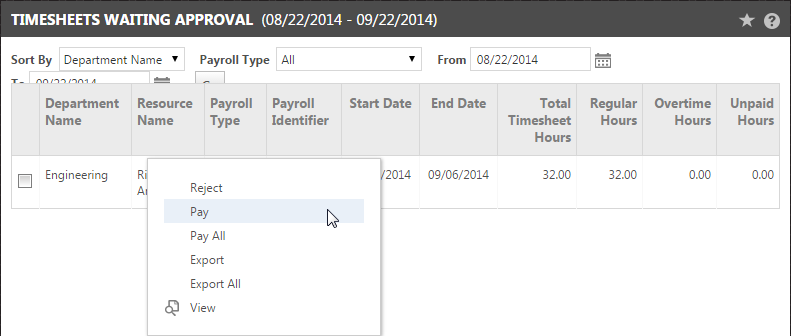
Other right-click options include Pay, Pay All, Export, Export All, and Reject.
- Select Reject to reject the timesheet. Refer to Approving or rejecting timesheets.
NOTE In this option, you are able to reject someone's timesheet, even if you are not the timesheet approver. The status in the Department Timesheet history is updated to Rejected, and it can now be edited and resubmitted by the user.
- For details on Pay, Pay All, Export, and Export All, refer to the section Timesheets Awaiting Payment, below.
TIP Best Practice: Even though you are able to update the status of a timesheet to Paid or Exported when it is still waiting for approval, we recommend that you wait until the timesheet has been approved. This minimizes the chance that already exported timesheets are rejected and will be resubmitted, and potentially exported twice.
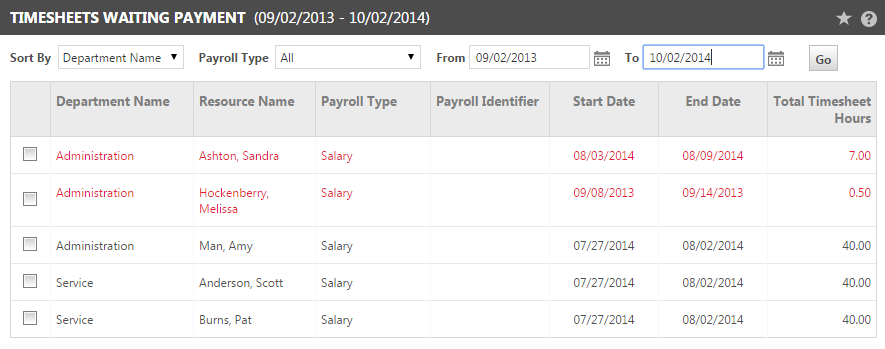
Timesheets Waiting Payment displays timesheets that have been approved but not yet marked as paid. You cannot reject timesheets that have been approved.
Filtering, sorting and viewing timesheets awaiting approval
For details on the filter and sort options for timesheets, and a description of the list columns, refer to the section Viewing timesheets waiting approval, waiting payment, or paid and exported, above.
Working with timesheets in the list
From this list you can view a timesheet and pay and export one or more timesheets.
View Timesheet
To view a timesheet, click the edit icon or right-click and select Review.
Pay, Pay All, Export, and Export All
To pay or export timesheets, select one or more timesheets and then right-click a timesheet in the list and select an option:
NOTE You can only approve timesheets for users that you are the timesheet approver for.
- Pay or Pay All: Check one or more timesheets and select Pay or Pay All to update the status of the timesheets to Paid. The page refreshes and the items will be gone. They can now be viewed on the Paid/Exported Timesheets page.
In Department Timesheet History, the status of these timesheets will be updated to Paid.
- Export or Export All: Check one or more timesheets and select Export or Export All to generate an export file.
The display will vary depending on your payroll vendor. For additional information, refer to Paychex export details or ADP export details.
The status of the exported timesheets in Department Timesheet History will be updated to Exported.
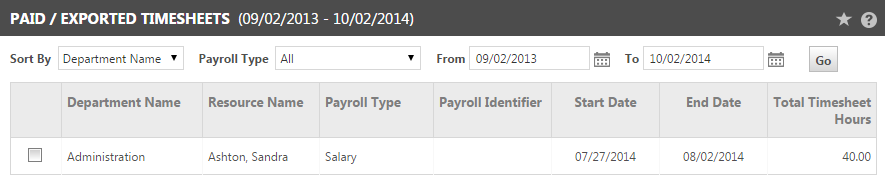
Select Paid / Exported Timesheets to display a list of timesheets from a selected date range that have been paid and/or exported.
Filtering, sorting and viewing timesheets awaiting approval
For details on the options to filter and sort timesheets, and a description of the columns in the list, refer to Viewing timesheets waiting approval, waiting payment, or paid and exported, above.
From this list you can view a timesheet and pay and export one or more timesheets.
View Timesheet
To view a timesheet, click the edit icon or right-click and select Review.
Export or Export All
Other right-click options include Export and Export All.
- Export or Export All: Check one or more timesheets and select Export or Export All to generate an export file.
The display will vary depending on your payroll vendor. For additional information, refer to Paychex export details or ADP export details.
The status of the exported timesheets in Department Timesheet History will be updated to Exported.
If your payroll vendor is Paychex, the export generates a tab delimited file.
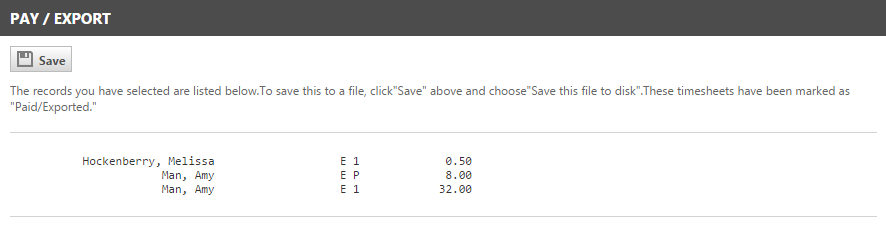
The columns show, from left to right, the Payroll Identifier number entered on the Resource Management > HR tab, the resource name, a Paychex code and the number of hours. The Paychex Code will be E for resource or D for Department, then one of the following:
1 = Regular Hours
V = Vacation
S = Sick Time
FH = Floating Holiday
H = Holiday
P = Personal
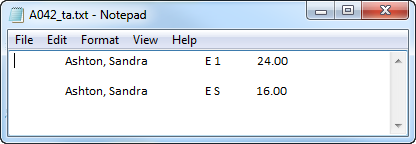
To save the file as an external .txt file, click the Save button in the sub-navigation bar.
- Select Save or Open. If you select Save, browse to the file location where you want to save, change the file name if desired, and save.
- If you select Open, you can view the exported file and then save it.
If your payroll vendor is ADP, when you select the Export option the Payroll Export Batch ID page opens.
A Batch ID number is required. The page displays an automatically assigned Batch ID number that increments by one each time a batch uses the automatically assigned number. You do not have to use the automatically assigned number.
You can enter any alpha-numeric value in the field. Batch IDs do not have to be unique, but we recommend unique Batch IDs as a best practice.
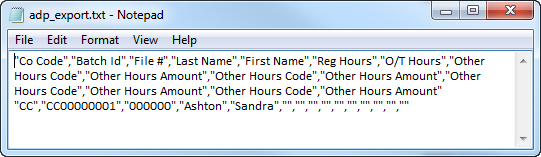
After you Save the Batch ID, the page closes and ADP generates a comma delimited file that displays in HTML in the Pay/Export page.
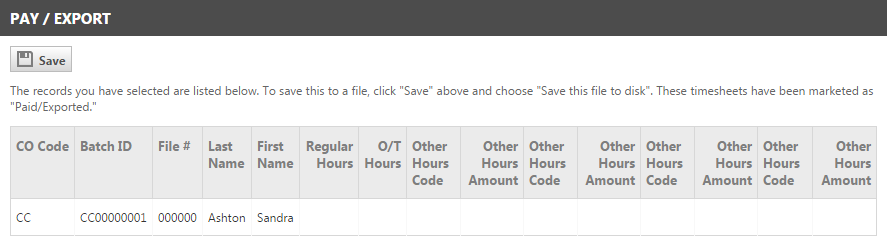
The display lists the following:
- Organization Code
- Batch ID
- File #
- resource Last and First Names (two columns)
- Regular Hours
- O/T Hours
- Any Internal Time Code hours that were specified in the Payroll Export Extension setup and were included in the submitted timesheets. These will display as "Other Hours Code", "Other Hours Amount". For information on setting up the Payroll Export Extension, refer to Setting up the Payroll Export Extension.
To save the export information in an external .txt file, click Save. Select Save or Open.
- If you select Save, browse to the location where you want to save the file, change the file name if desired, and save.
- If you select Open, you can view the exported file and then Save it.